
Care sheet 04 of 06
Rooting cuttings and grafting with Peruvian torch
How to root a Peruvian torch cutting, take a cutting from your own plant, and use Peruvian torch as grafting stock with a flat graft, from cut to aftercare.
Updated
- Light Bright, out of hard sun until rooted
- Water Dry until roots form
- Cold Do it while the plant is in growth
A Peruvian torch cutting roots in three moves: let the cut end dry until it forms a callus, stand it upright on a dry, gritty mix, and hold back water until roots have formed. Grafting uses the same plant the other way round: its vigorous stem is one of the classic stocks onto which growers graft other cacti. Both work best in late spring and summer, when the plant is in full growth.
The cutting method follows the Royal Horticultural Society's cactus and succulent growing guide. The grafting steps follow the guide published by the Teesside branch of the British Cactus and Succulent Society and the University of Florida's plant propagation course notes on grafting cacti.
Rooting a bought cutting
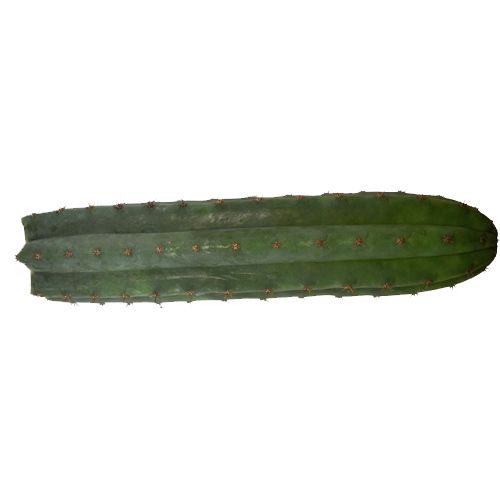
Peruvian Torch 25–30 cm - Trichocereus peruvianus
View at Dutch-Smart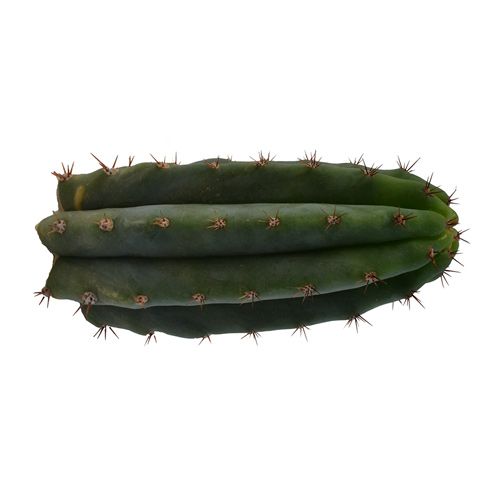
Peruvian Torch - Trichocereus peruvianus
View at Dutch-Smart- Check the base. A cutting from a shop has usually been cut some time ago. If the base is dry and closed with a pale, papery skin, it is ready. If it still looks fresh and moist, leave it to dry first.
- Let it callus. Stand or lay the cutting in a dry, airy, shaded place. The RHS writes that the cut end needs to "dry out and produce a callus. This can take anything from a day to a week, depending on the plant." A thick stem like a Peruvian torch can take the longer end of that range.
- Pot it up dry. Use a pot only a little wider than the stem, with drainage holes, filled with a gritty cactus mix (2 parts peat-free John Innes No 2 to 1 part grit or sharp sand). Push the base in just deep enough to stand, or support it with a stick or a ring of stones.
- Wait for roots. Keep it bright but out of hard midday sun. Give no water, or at most a light sip every couple of weeks in warm weather, until roots form. A gentle tug that meets resistance, or new growth at the tip, tells you it has rooted.
- Move on to normal care. Once rooted, water thoroughly when the mix has dried, and move the plant step by step into full sun. From then on the care sheet applies.
The commonest failure is rot at the base from watering too early. A cutting has no roots to take water up, so wet compost around a fresh cut is an invitation to fungus.
Taking a cutting from your own plant
Once a Peruvian torch has grown on for a season or two, you can take cuttings yourself.
- Use a clean, sharp knife and wear thick gloves. The stout central spines of this species are the reason gloves are not optional.
- Cut straight across a stem, or at a slight angle if you want water to run off the stump.
- Dry the cutting as above. The stump on the mother plant seals over and often puts out one or more new shoots from the areoles below the cut.
Peruvian torch as grafting stock
Growers have long used this plant as a rootstock. Albesiano and Kiesling, in their 2012 revision of the species, note that most of the literature they reviewed highlights "the remarkably glaucous epidermis and the use of the species as a good grafting stock". The BCSS guide likewise recommends "a vigorous species (usually Trichocereus)" as stock, and says the stock "must be in full growth".
Grafting is how growers rescue a plant with a rotting base, keep cacti alive that struggle on their own roots, and give small seedlings or slow species a faster start on a strong root system.
A flat graft, step by step
- Prepare the stock. Choose a rooted, actively growing Peruvian torch stem. Cut it straight across with a sterilised blade, and bevel the edges of the ribs slightly so the cut surface does not cave in as it dries.
- Prepare the scion. Cut the plant you want to graft (the scion) straight across, so its cut surface is fresh at the same moment as the stock's.
- Line up the rings. Inside every cactus stem is a ring of vascular tissue, visible as a pale circle on the cut surface. The University of Florida notes explain that "the central core of the scion and rootstock must be lined up to allow the vascular system to become connected". The BCSS guide adds that the two rings must overlap in at least one place; if the scion is much smaller, set it off-centre so its ring crosses the stock's.
- Press together. Push the scion onto the stock, giving it a slight twist to press out air. Hold it in place with rubber bands or string looped under the pot, or with weights or clips.
- Aftercare. Put the graft in a warm, dry place out of direct sun for a few days, as the BCSS guide advises, until the joint has taken. Then remove the bands and care for the plant as normal, increasing light gradually.
A graft that has taken stays firm and the scion stays plump and starts to grow. A scion that shrivels, or comes off with a gentle push after a couple of weeks, has not joined; recut both surfaces and try again while the stock is still in growth.
Which piece to buy for grafting
For grafting you need a rooted, growing stock. The 25 to 30 cm cutting gives the most room: root it in spring, let it grow through the summer, and the next season you can cut its top as a new cutting and graft onto the rooted base. For seedlings to graft, see growing from seed.
Next: care through the year · identify your plant · which cutting to buy